10415 172nd St. E., Hangar A1
Puyallup, WA 98374
office (253)770-9964
or (253)770-0120
email: avstarair@att.net
This time, more detail is put into fuselage components and control surfaces.
891JH Update #3
Note: To decrease your download time we have made these pictures thumbnails. Just click on any picture to see a larger version of it. Use your browsers back button to return.

Differential control was removed and cleaned; disassembled and then further cleaning followed. After passing inspection, it was painted, then reassembled with new hardware and bearings.
Then, the differential control was reinstalled, cables attached, and preliminary rigging complete.
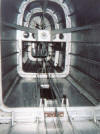
Cabin system rework included rebuilding the master cylinders, and adding co-pilot brakes. The shuttle valves were installed, and the system was plumbed from firewall to wing roots; then capped, until final assembly. Part of the new fuel system plumbing is also visible.
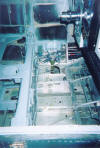
Another view of the cabin fuel system installed and plumbed up. Additional lines needed to be added to allow fuel return to the right wing, as well as the electric boost pump and the necessary check valves. Once all the lines were fabricated and fit, it all came apart again for cleaning. The pump was overhauled, the selector resealed. Here, it’s all back together and capped off, awaiting final assembly.
For installing other than an E-series engine, the engine mounting structure is completely different. Current plan is for an IO-470 to be installed, but the mounting system we will use will be able to take up to the IO-550. In preparation for this, the nacelle sheet metal was removed as required, and then the area cleaned, again!
After accounting for some loaner units I desired to keep, we had only one control surface re-useable; the left flap. The ailerons both needed spars and skins.
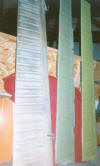
Right flap on repair fixture, all holes drilled. Next step: take apart, de-bur the holes, and final assembly.