![]()
10415 172nd St. E., Hangar A1
Puyallup, WA 98374
office (253)770-9964
or (253)770-0120
email: avstarair@att.net
A TAT equipped A36 receives an Intercooler upgrade
Note: To decrease your download time we have made these pictures thumbnails. Just click on any picture to see a larger version of it. Use your browsers back button to return.
One of our customers with a TAT equipped A36 decided to perform the intercooler upgrade. Sounds like a great idea to us!
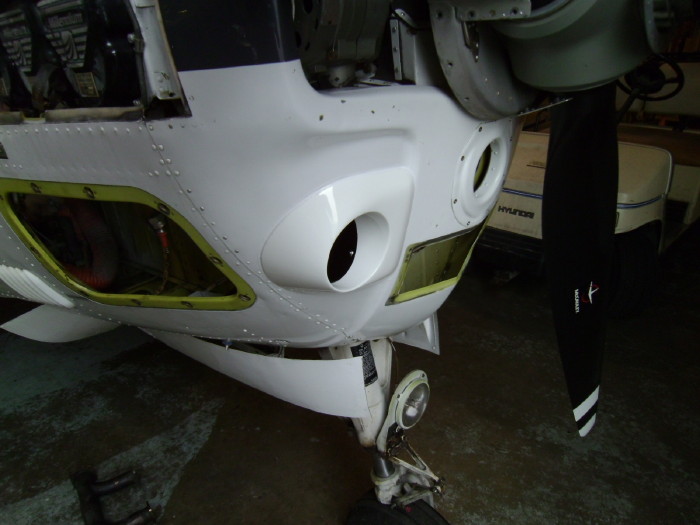
The aircraft and kit arrive to our facility, parts checked in, and work begins. Let's see where we need to work.
As alignment of the inlet to the intercooler to the scoop is critical, so the intercooler is located. 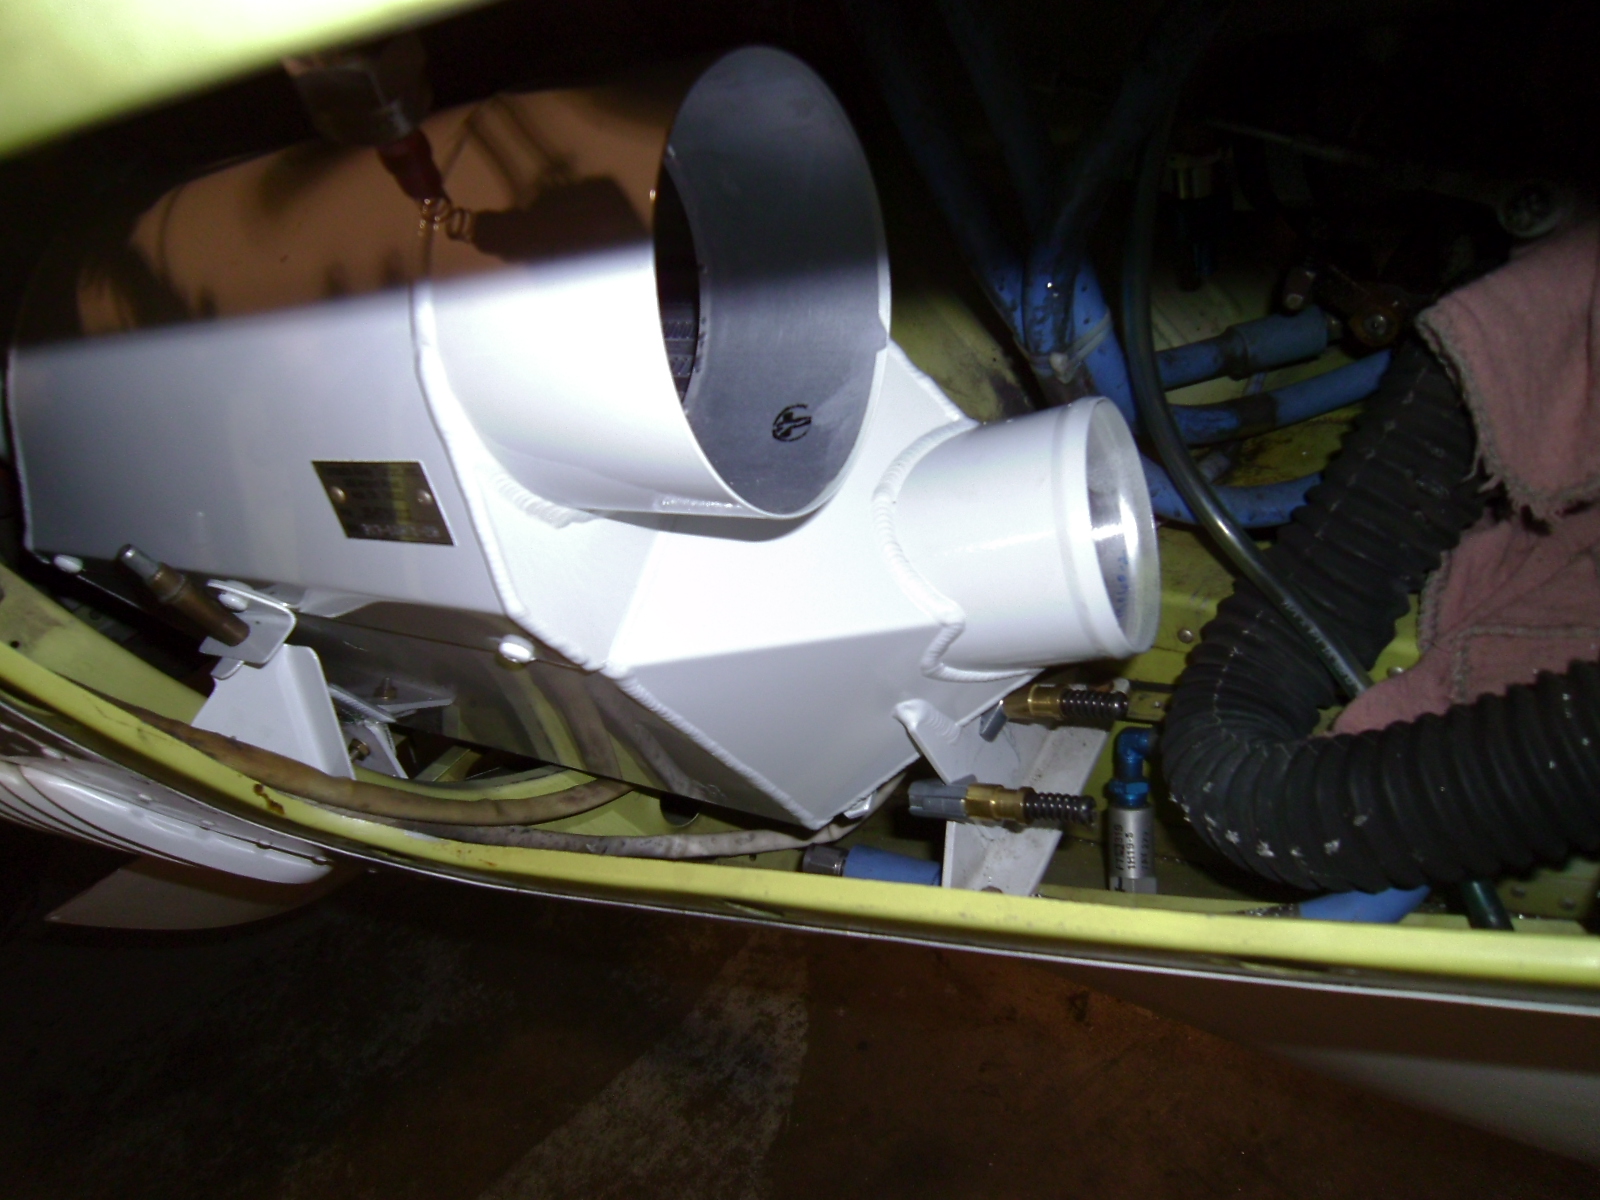
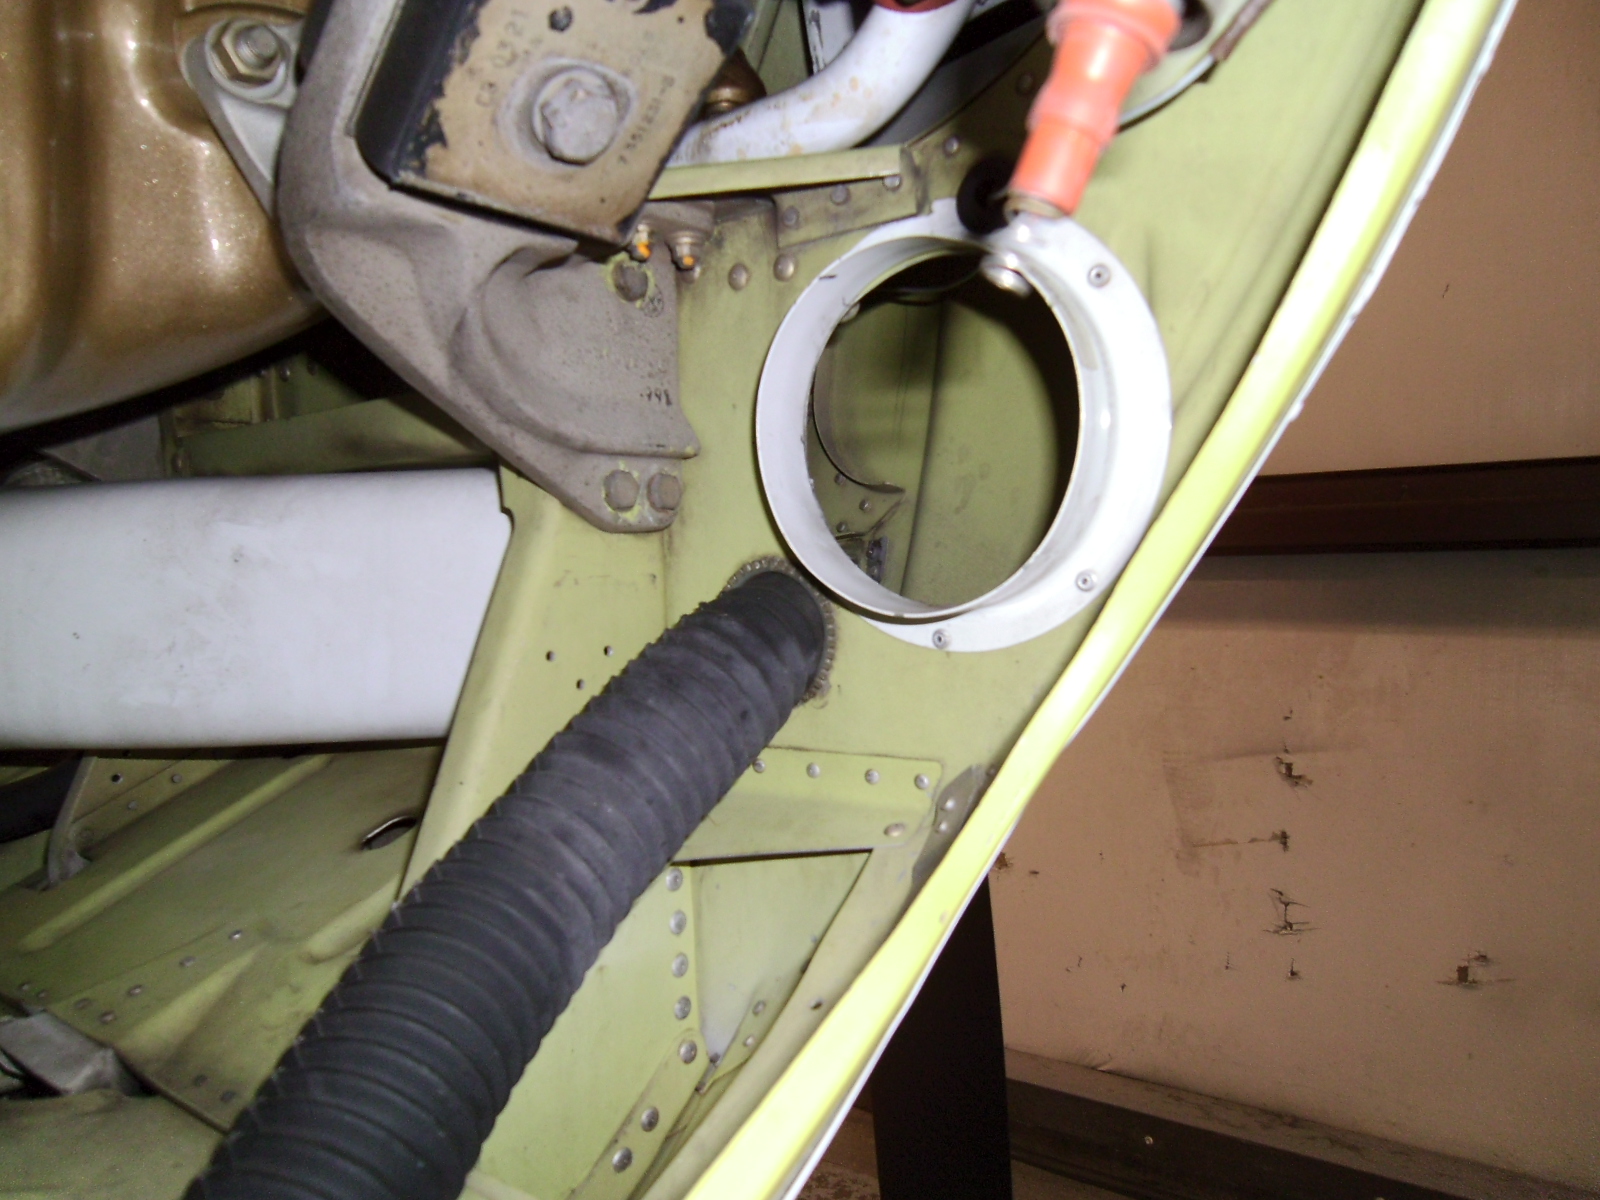
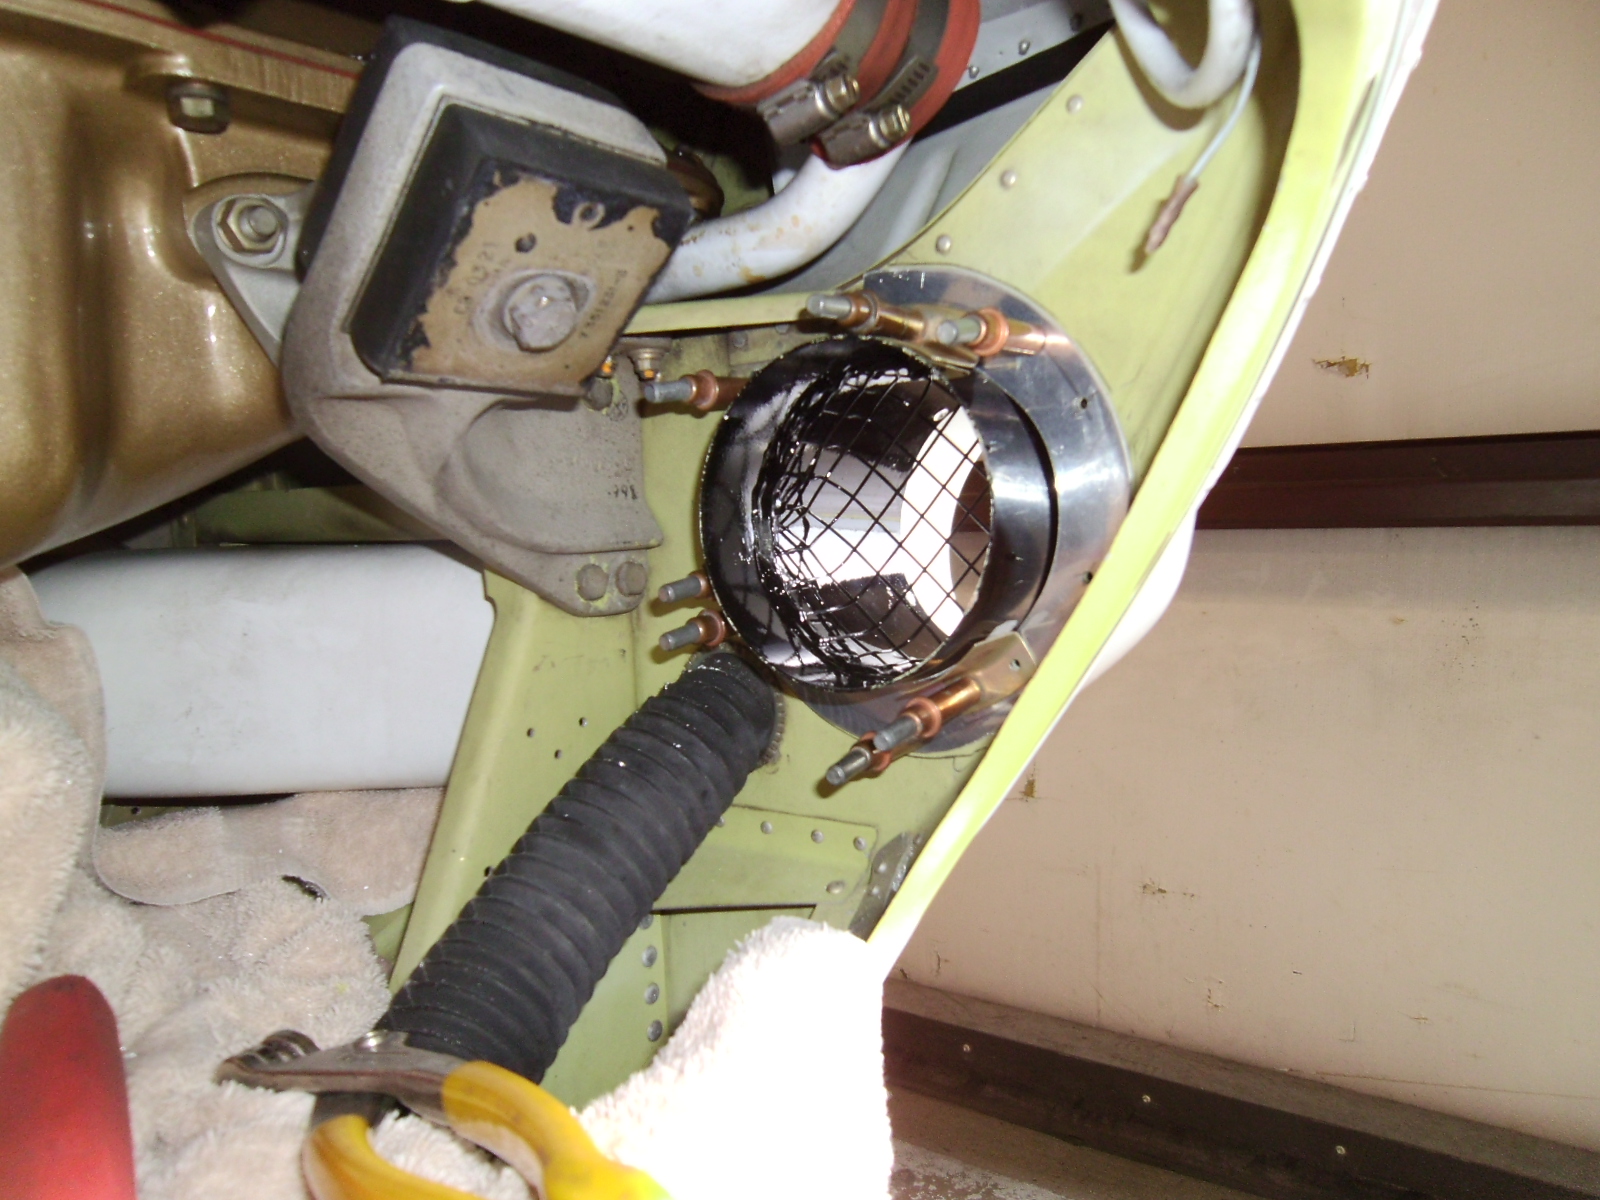
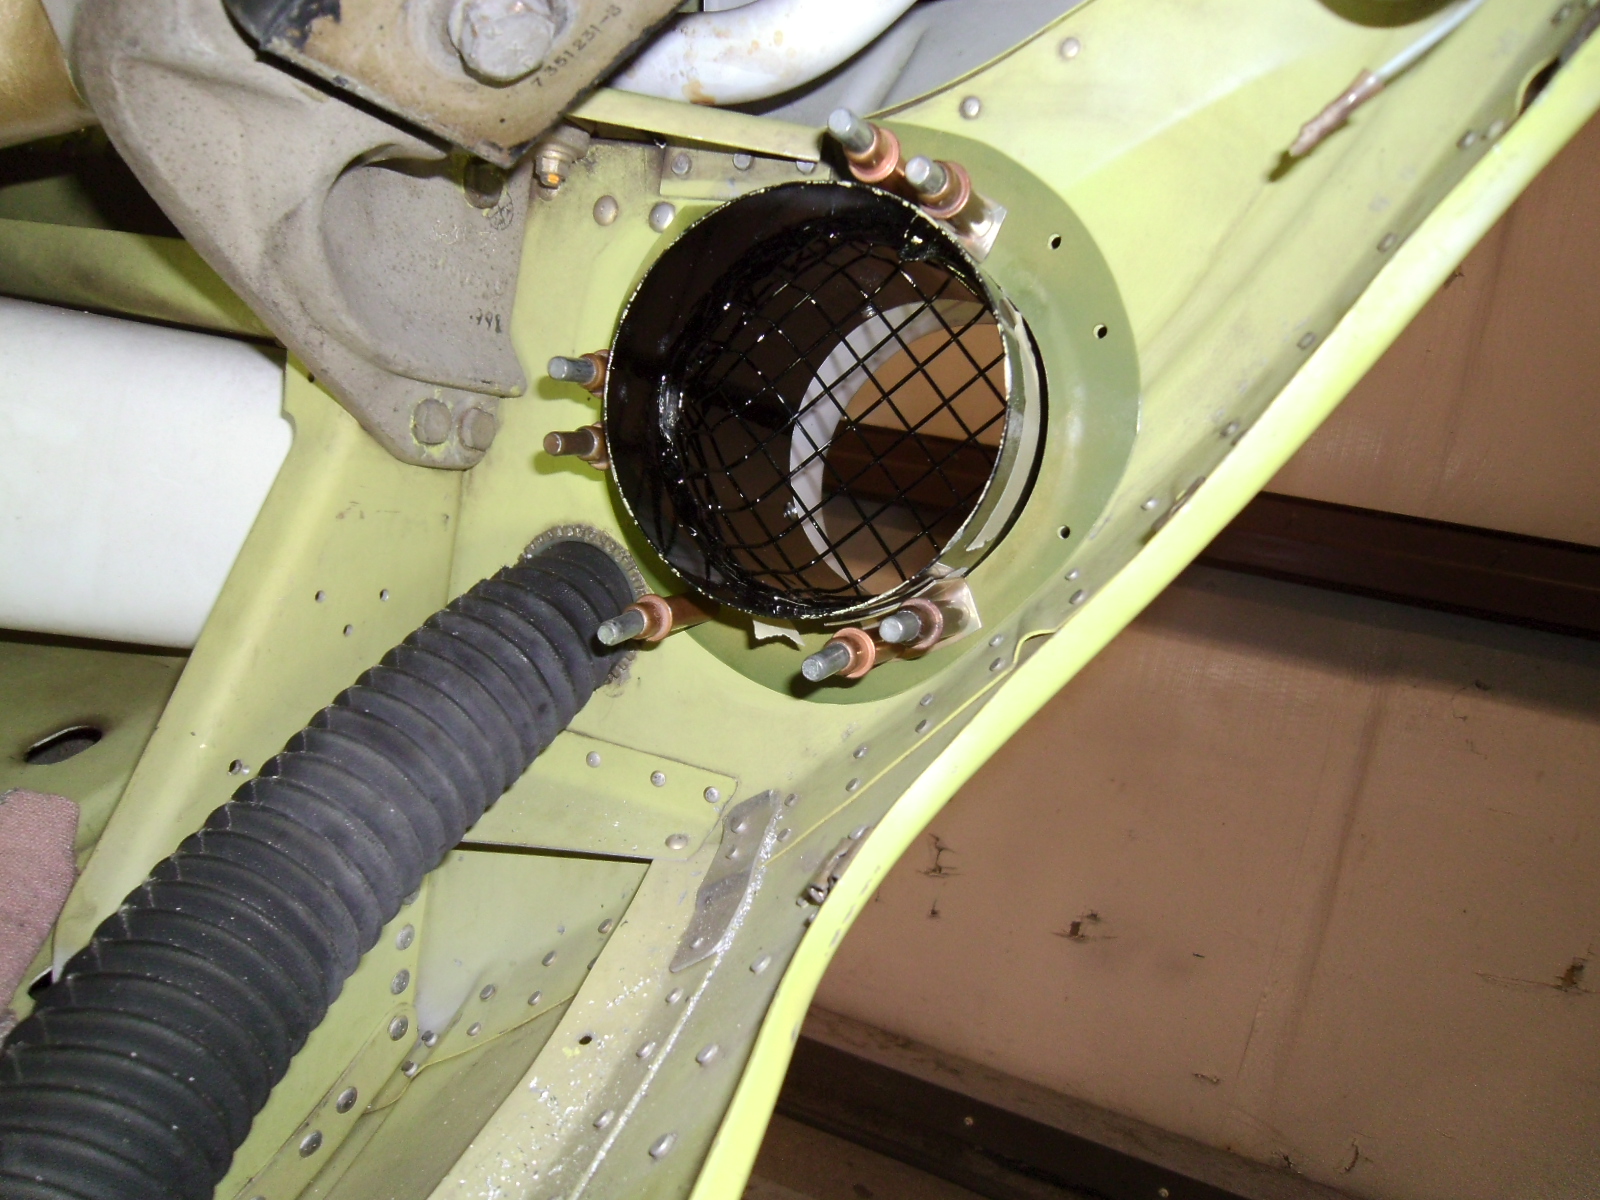
Turbo inlet and injection metering unit plugged from FOD, template lay-out, then intercooler removed. Now we look at it a while before cutting!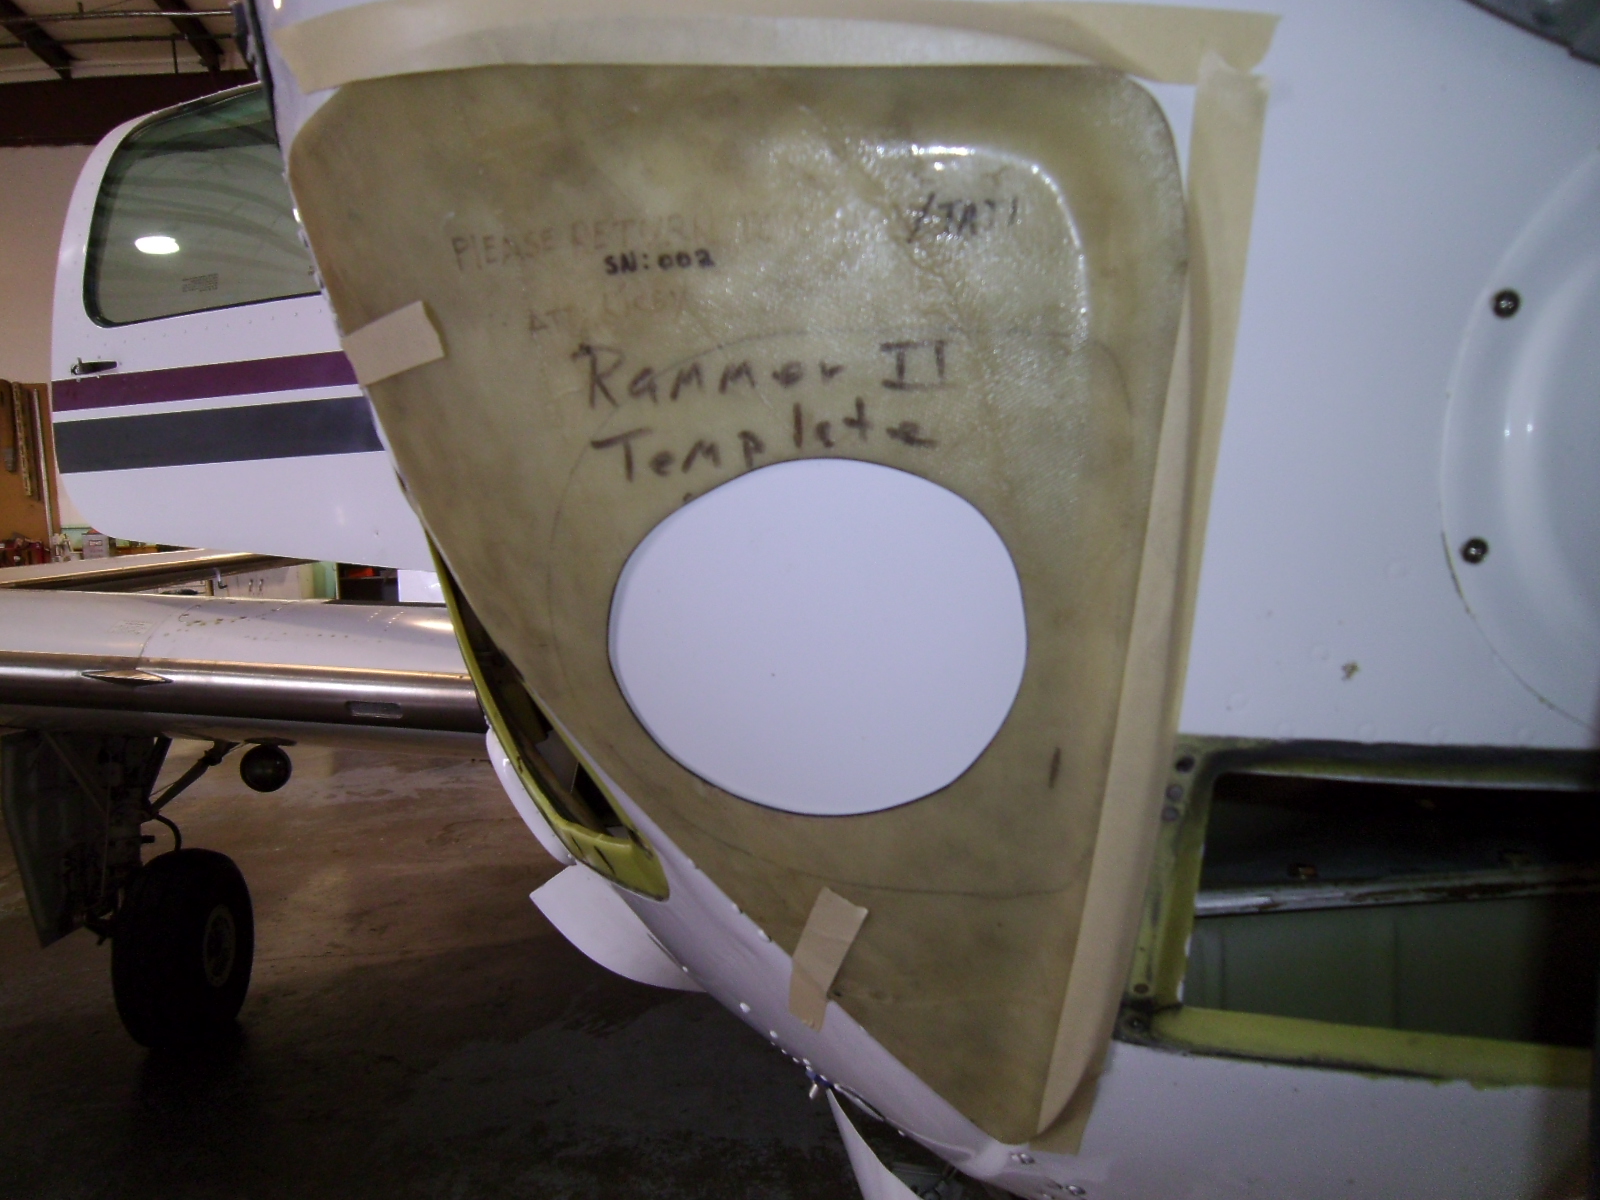


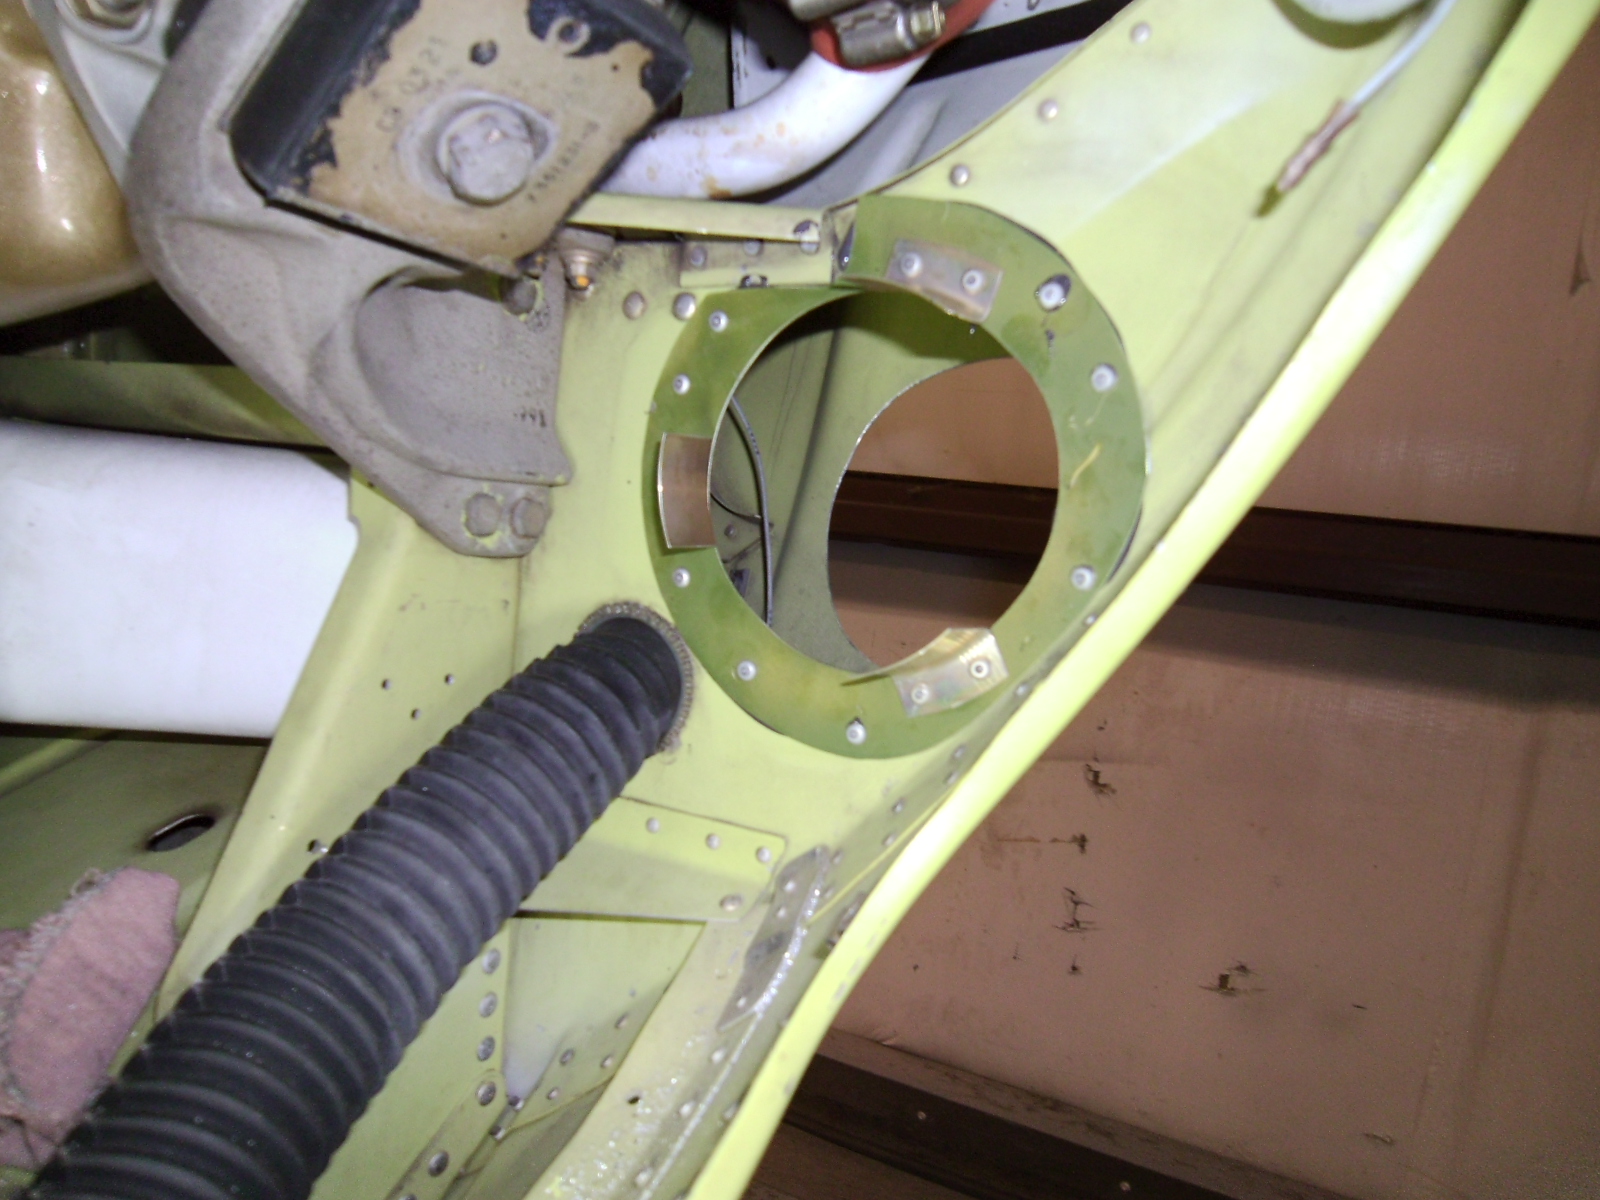
Initial fit of the scoop showed a pronounced mis-alignment to the bulkhead, so that required grinding out for a straight-through fit from scoop to intercooler. Enough material was removed that an 'adapter' from the bulkhead to the tube was required.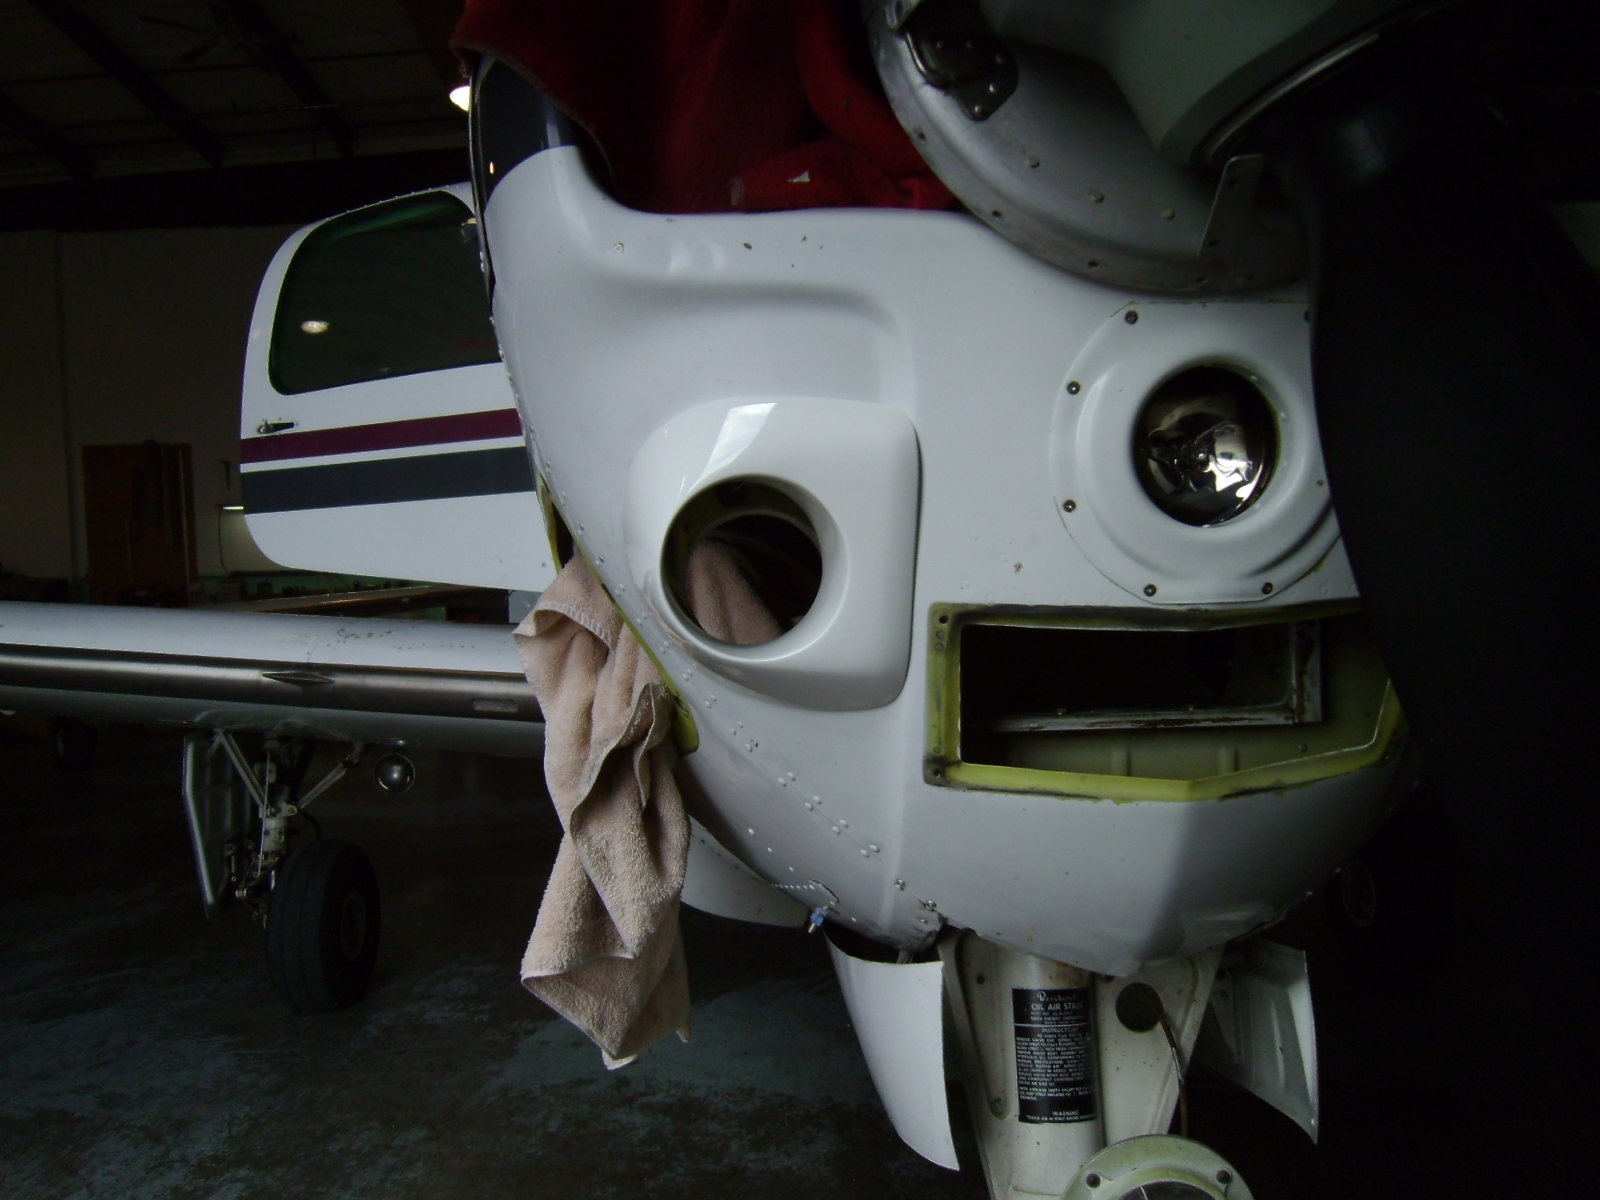


Final fit check made and bond area masked, bond area to nose bug sanded and cleaned.
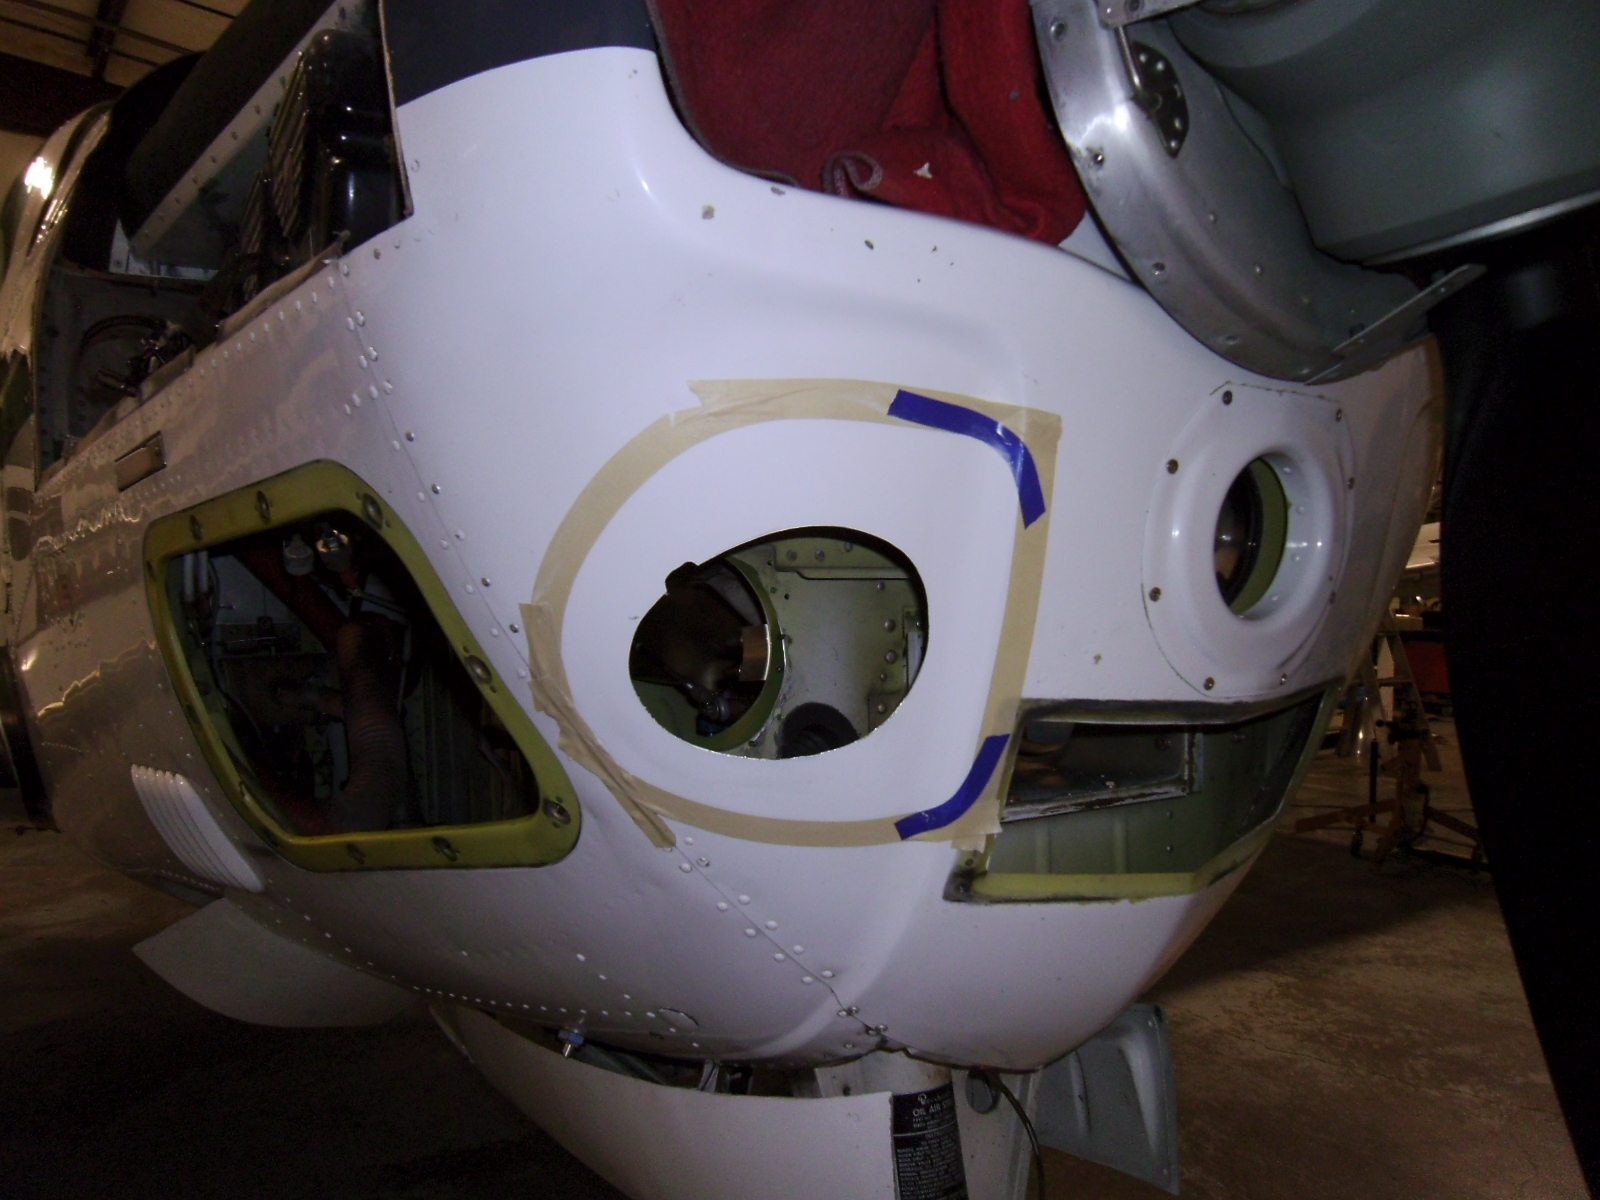
Adapter plate and tube support angles are installed with pro-seal and cherry-max rivets.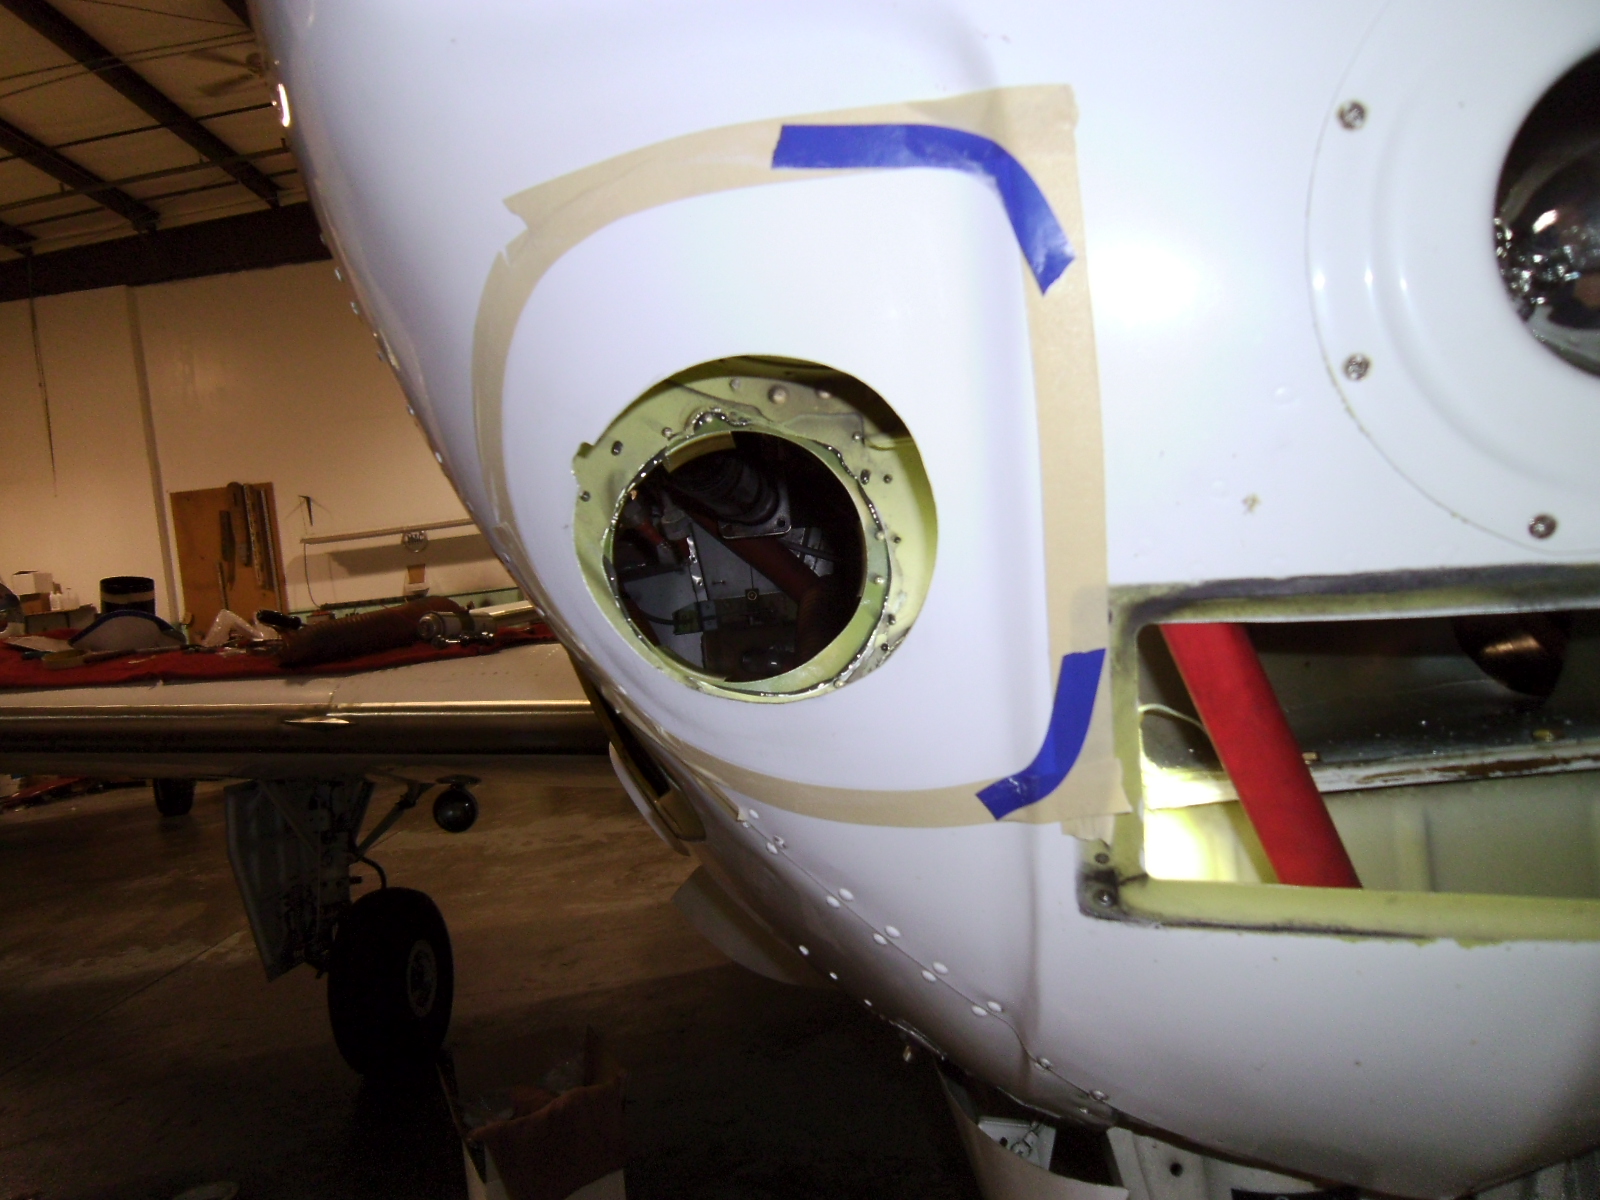
Pro-seal applied to back of scoop, as well as a generous bead around the tube to seal the tube to the adapter on the bulkhead, then the assembly installed and clamped to the new flanges on the bulkhead to hold in position.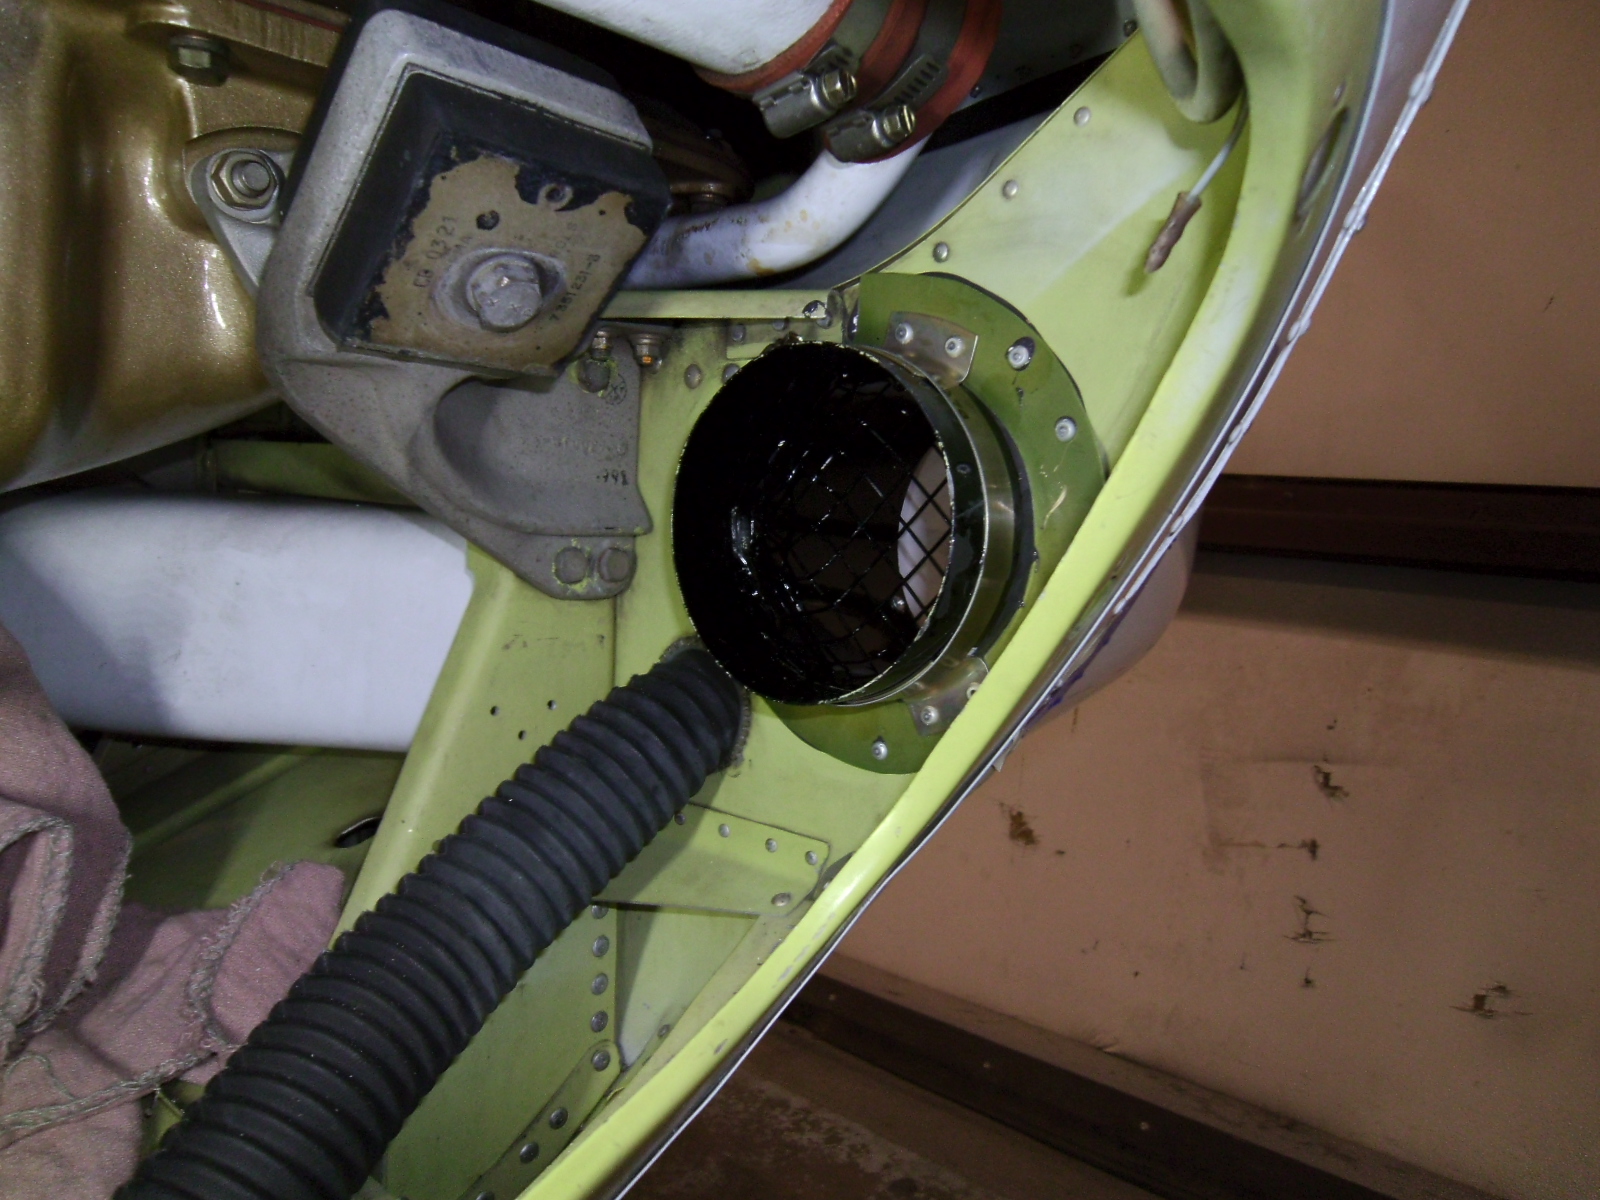
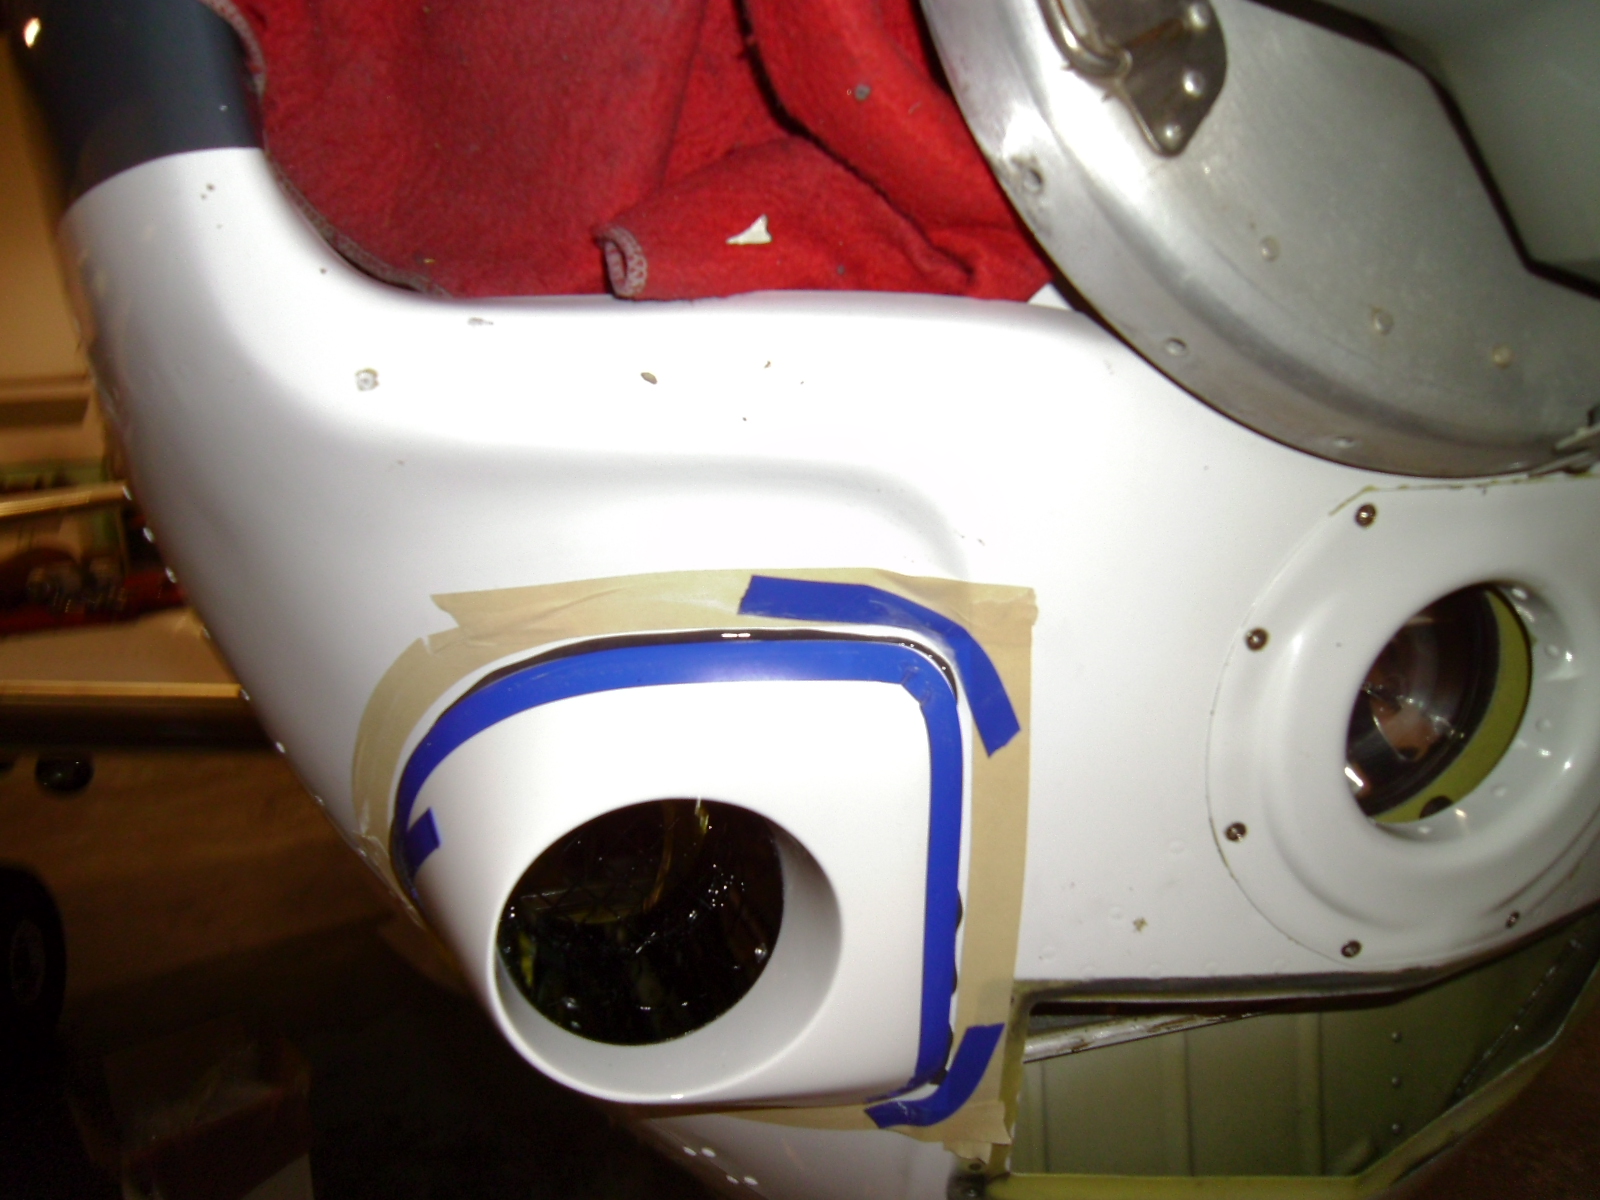
Additional pro-seal added to form a smooth transition from the scoop to the nose bug, and then the mask removed. Walk away for a day or so...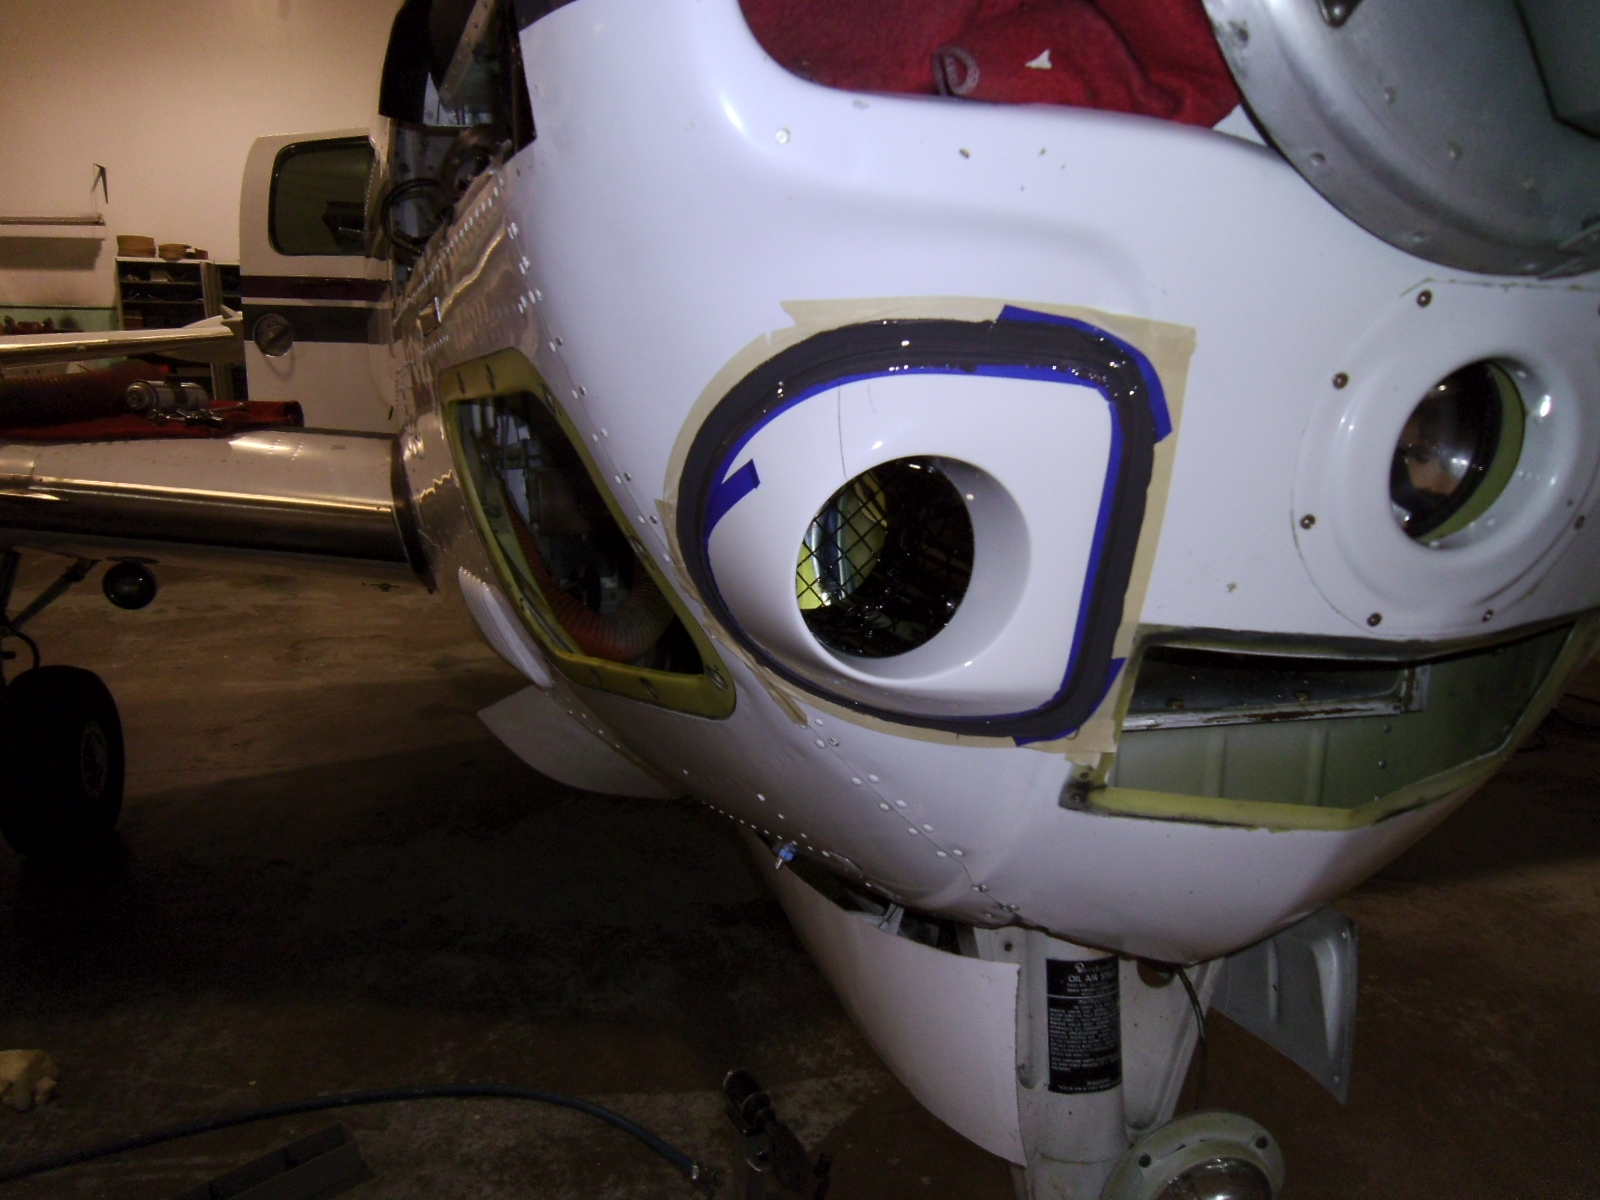
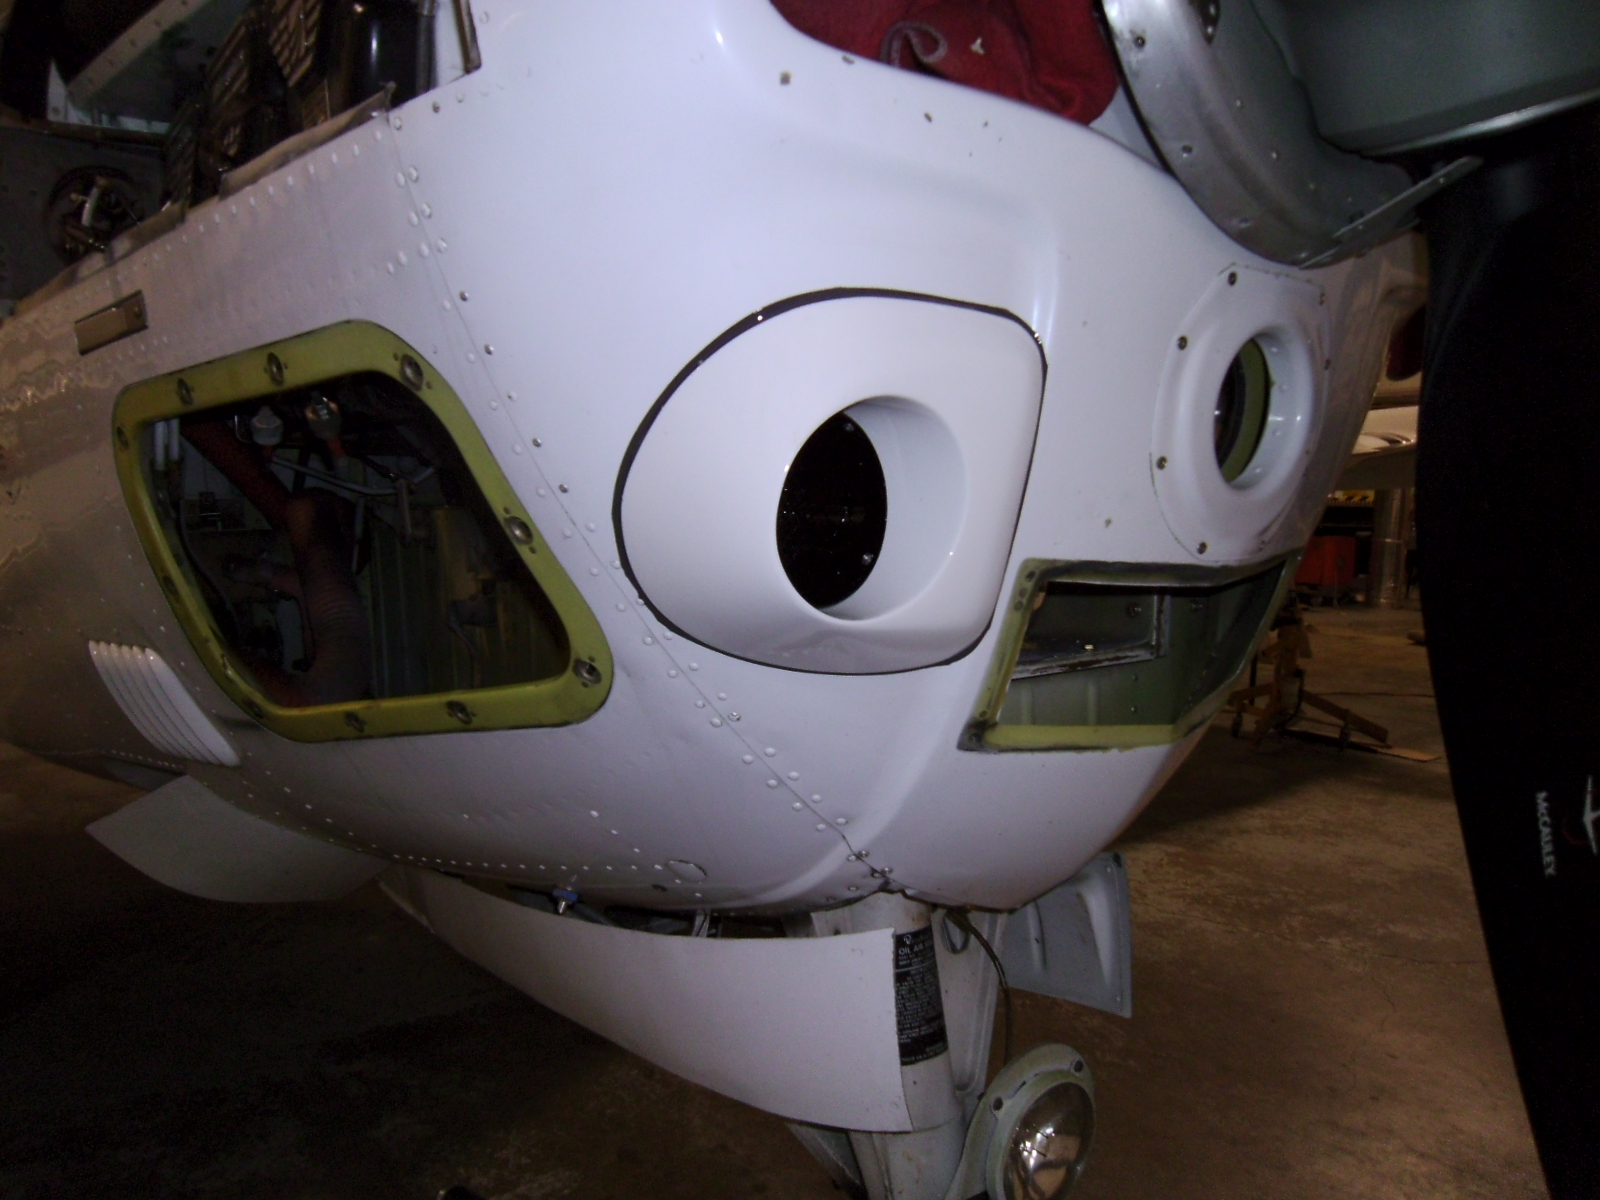
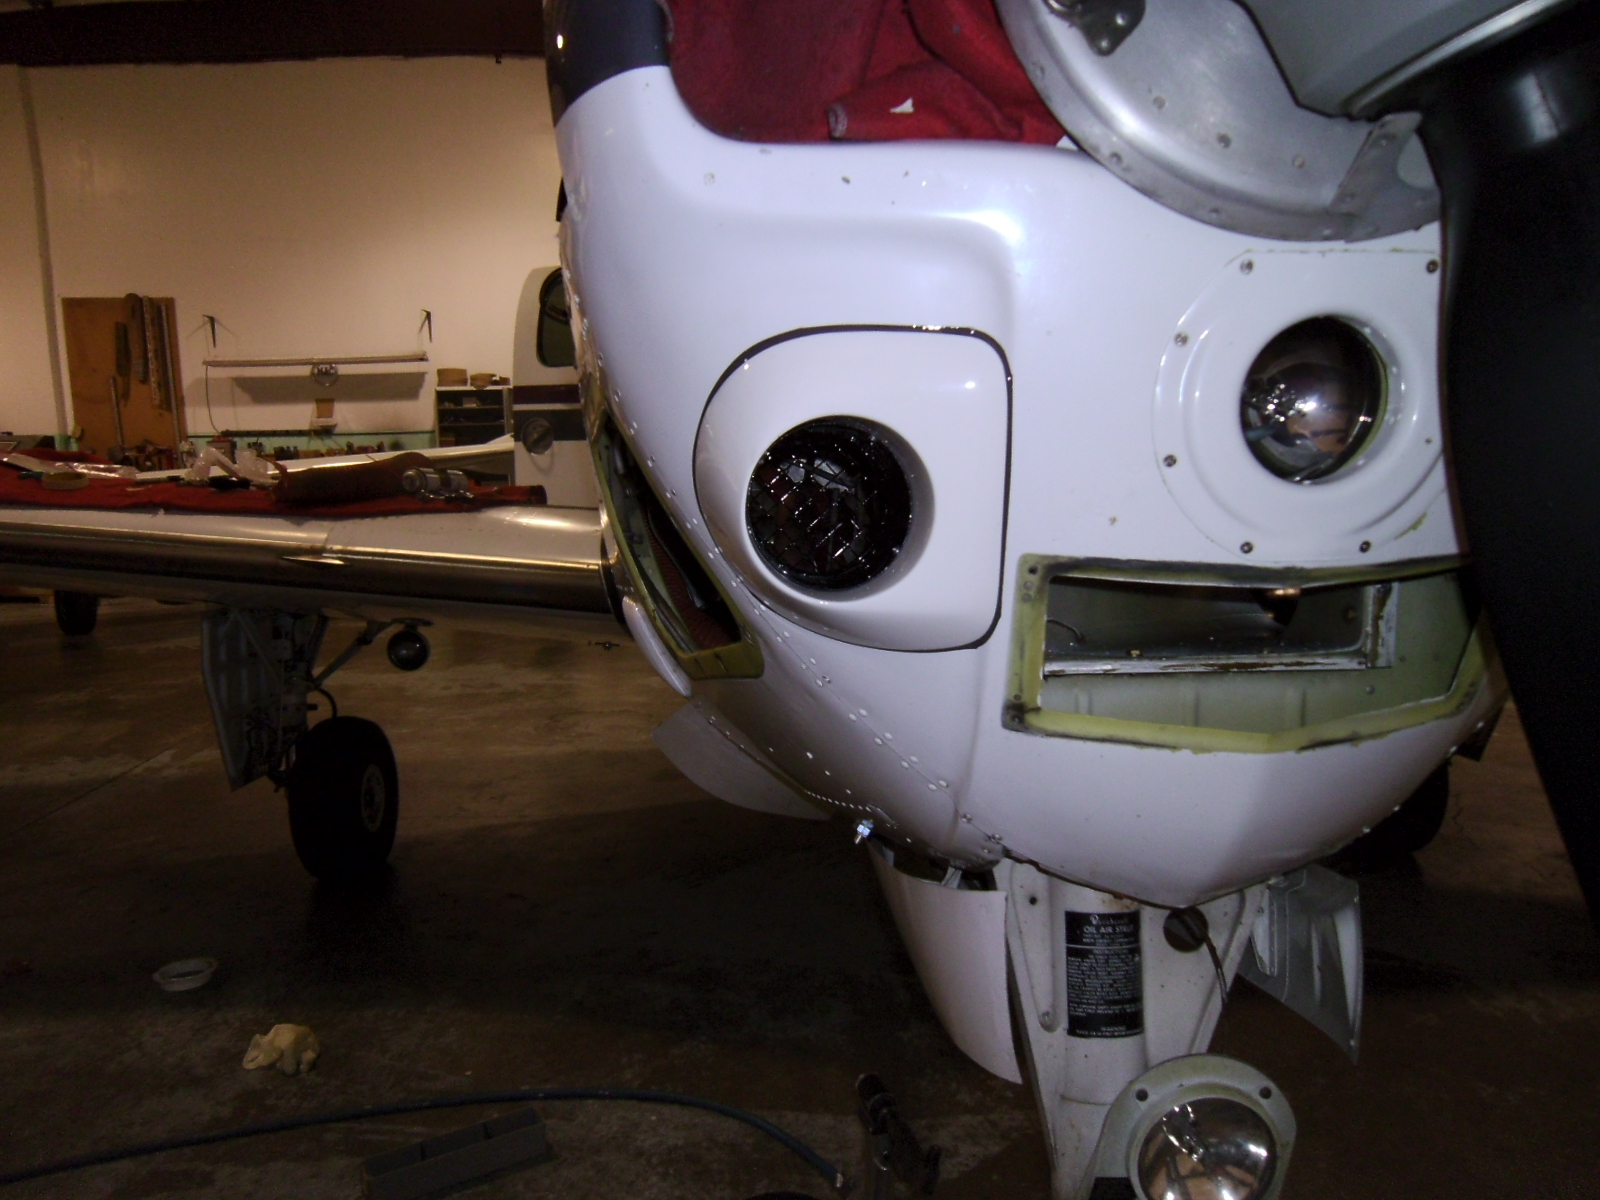
A little bit of detail work and it looks like the scoop has been there since new. Customer is pleased with net result in rate of climb.